| <<< CRUX1 | Mizar S >>> |
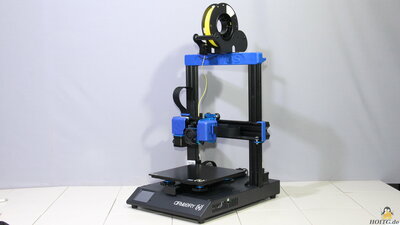
Genius Pro from Artillery
The gadget in moving pictures with audio
You can buy the Artillery Genius Pro via my affiliate partner zBanx.
Or have a look at the larger version, the Artillery Sidewinder X2
By purchasing via the specified affiliate links, you support HOITG without any additional costs for you - thanks!
How Open Is This Gadget?
| Category | remark | Info |
|---|---|---|
| Firmware |
Uses Marlin firmware, modified source code is published. |
? |
| Software |
Machine data can be processed with common open source software that generates Gcode. |
? |
| Hardware |
Most parts are very easy to replace, common screw types, common components. Only the glass plate of the print bed is glued to the print bed heater and cannot be replaced individually. |
? |
| Elektronik |
Mainboard uses a standard STM32 microcontroller. Stepper motor drivers are plugged onto the circuit board and can be replaced. |
? |
| Website |
Website of Artillery offers firmware downloads The Source code of the modified MArlin firmware is published in the download section. |
? |
| Patents |
The Z-axis lead nut attachment is advertised on Artillery's website with a pending patent. |
? |
About the Gadget
Figure 1:With dimensions 43x39x59cm, the Genius Pro is a rather compact 3D printer that doesn't take up too much space on your workbench or desk. The print volume of 22x22x25cm is large enough for most projects.
There is a filament sensor, which automatically pauses the print if the plastic wire on the spool runs out. After changing the filament, printing can be continued. Printing can continue even after a power failure. These two functions are particularly useful when printing large objects.
In contrast to some competitors, Artillery follows the rules of the license for the Marlin firmware used and links the source code of the modified version directly on the manufacturer's website. This is totally in the spirit of "How Open Is This Gadget?".
Techncal Data
| Category | Value | Remark |
|---|---|---|
| Print volume | 220x220x250mm | |
| Dimensione | 430x390x???mm | Including filament spool on top of the frame. |
| Bed heating | Up to 130°C | |
| Hotend | Up to 250°C | |
| Firmware | Marlin | |
| Extras |
Filament sensor Resume after power loss. Print data can be transferred via USB stick or micro SD-card. |
Package contents
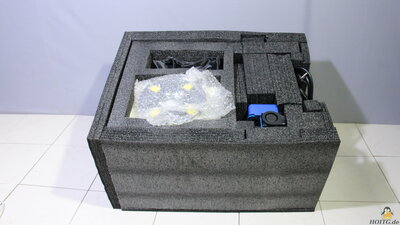
Figure 2:The package includes the tools for assembling the printer, replacing the 0.4mm nozzle and adjusting the mechanics. The brief assembly instructions are included in printed form and are also on the USB stick.
Assembly
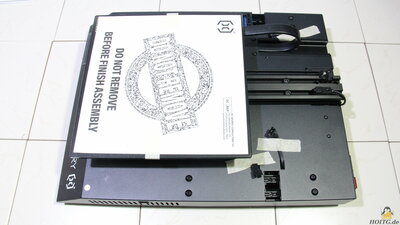
Figure 3:The Geetech Pro is delivered almost fully assembled, only frame and base have to be assembled and the spool holder has to be attached. Reverse polarity protected plugs must be plugged in for wiring.
Mechanics
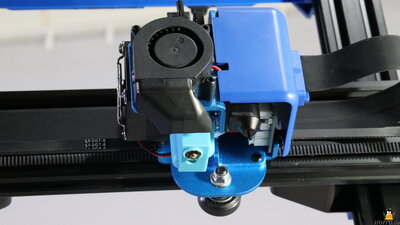
Figure 4:The axes are guided along extruded aluminum by plastic rollers with ball bearings. Backlash can be eliminated by turning an eccentric nut. The belt tension on the X and Y axes can be adjusted by moving the pulleys.
The two spindles of the Z-axis are coupled via a timing belt, which means that the two ends of the X-axis cannot be moved asynchronously even when the device is switched off.
The Genius Pro uses a direct extruder. The extruder motor pushes the filament towards the hotend with a gear reduction of 3:1. The can be disassembled relatively easily if necessary.
Electronics
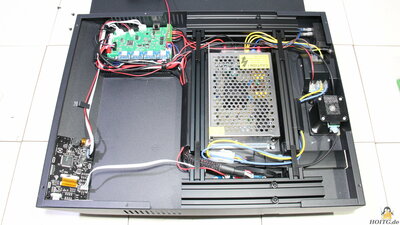
Figure 5:The electronics is housed in the base. The power supply delivers an output voltage of 24V at up to 8.5A, which corresponds to around 200W.
An STM32F microprocessor works on the mainboard, running the open source firmware Marlin. The stepper motor drivers type TCM2208 are plugged in, so they can easily be replaced if needed.
The color touchscreen has a resolution of 480x320 pixels.
The is a sensor with an extendable pin on the print head for leveling the build plate. This also serves as a limit switch for the Z axis.
Electronic limit switches are attached to the X and Y axes.
Test prints
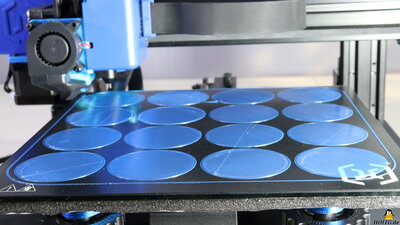
The G-Code and stl Files of the test prints done with the Genuis Pro are available as download (9.3MB).Figure 6:
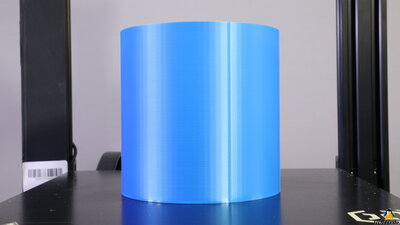
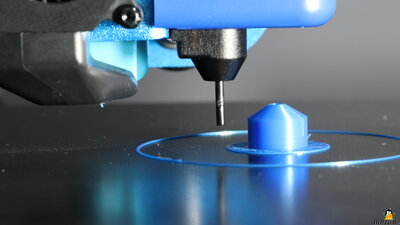
With this first print, the automatic level function is checked. 16 discs, each with a diameter of 50mm, are printed on the build plate. The layer height is 0.2mm, the print speed is set to 15mm/s.
All details on the test procedure.
Figure 7:
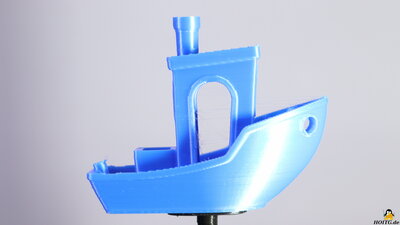
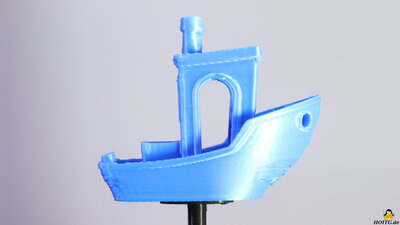
3D Benchy with optimal settings
All details on the test procedure.
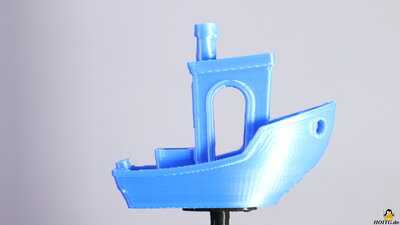
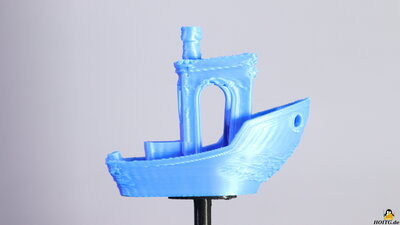
With the test prints of the Benchy processed with increasing speed, it is less important to see what is bad and more important to see what is still printed well.
Read all details on the test procedure.
Figure 8:
3D Benchy with 60mm/s
All details on the test procedure.
Figure 9:
3D Benchy with 90mm/s
All details on the test procedure.
Figure 10:
3D Benchy with 120mm/s
All details on the test procedure.
Figure 11:
In order to print large objects quickly, as much plastic as possible must be extruded per unit of time, which is tested here.
Layer height: 0.4mm
Extrusion width: 0.7mm
A, F, K = 30mm/s
B, G, L = 60mm/s
C, H, M = 70mm/s
D, I, N = 80mm/s
E, J, O = 90mm/s
All details on the test procedure.
Figure 12:
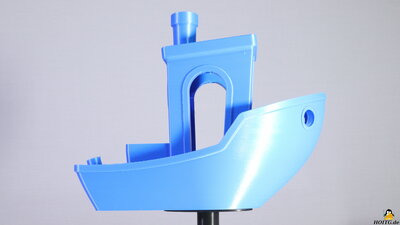
Large 3D Benchy with optimal speed settings
Benchy enlarged to 420% (252x130x202mm)
Print time: 12.5 Stunden
All details on the test procedure.
Modification
Figure 13:The plastic pin of the sensor for leveling the print bed sticks out about 5mm from the housing even when it is retracted. If an object detaches from the build plate during a print - which happens quite often - there is a risk that this pin will get stuck on it and break off (if you're lucky like me, the pin will only be bent a little). To prevent this, I printed a small plastic ring that is attached to the lower end of the sensor with superglue. The pin is thus protected in the future. The lower edge of the protection ring must be higher than the tip of the nozzle! The part I printed is included in the Genius Pro download package (9.3MB).
My conclusion
An easy-to-use, well-functioning 3D printer, therefore also suitable for beginners. Unfortunately, Artillery claims a patent (pending) on the attachment of the Z-axis lead nut. That doesn't sound like much, but: Anyone who sells a machine whose technology is 99% copied from other machines because they were developed without patents should not start by claiming one percent of their own work only for themselves!Artillery uses the open source firmware Marlin for the Genius Pro and is committed to making the changes available to the general public (Openness works!).
In addition to functions for ease of use (autoleveling, touchscreen, USB and micro SD card slot), there are no unnecessary frills installed.
| <<< CRUX1 | Mizar S >>> |
