| <<< Genius Pro | Ceramic printers >>> |
Mizar S from Geeetech
The gadget in moving pictures with sound
You can buy the Geeetech Mizar S on Amazon.com
By purchasing via the specified affiliate link, you support HOITG without any additional costs for you - thanks!
Or buy in the online shop of Geeetech
How Open Is This Gadget?
| Category | Remark | Info |
|---|---|---|
| Firmware |
Uses Marlin Firmware. Common 480x320 Touchscreen. |
? |
| Software |
Machine data can be prepared with common open source software to generate Gcode. |
? |
| Hardware |
Most components are very easy to replace, common screw types, nothing is glued. Only the connector to the Teflon tube on the extruder motor cannot be replaced, but there is a solution (see bottom of this page). |
? |
| Elektronik |
On the mainboard is a common STM32 microcontroller. Stepper motor drivers are soldered on the mainboard. |
? |
| Website |
New Firmware versions are available for download on the manufacturers websits The source code of the Marlin based firmware is published on Github. |
? |
About the gadget
Figure 1: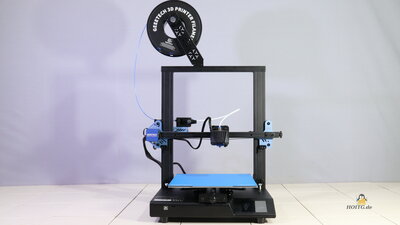
With the dimensions 36x38x72cm, the Mizar S from Geeetech is quite compact. The frame is made of extruded aluminum measuring 20x20 and 20x40mm, the electronic components are in the metal box that covers the base of the printer. The maximum print volume is 255x255x260mm.
The heated print bed reaches 100°C after 10 minutes and 110°C after 15 minutes, which is the maximum temperature. On top of the print bed is a plastic-coated steel plate that magnetically sticks to the bed, making it relatively easy to detach the prints.
The belt tension of the X and Y axes can be easily adjusted via small handwheels.
To level the print bed, the force sensor must first be triggered manually using one of the wrenches. After that, the firmware takes over and measures the height of the print bed at 9 points. There are no adjusting screws on the print bed, manual leveling is not necessary, but also not possible.
Technical data
| Category | Value | Remarks |
|---|---|---|
| Print volume | 255x255x260mm | |
| Machine dimensions | 360x380x720mm | Including the filament spool on top of the frame. |
| Heated bed | up to 110°C | |
| Hotend | up to 250°C | |
| Firmware | Marlin |
Package contents
Figure 2: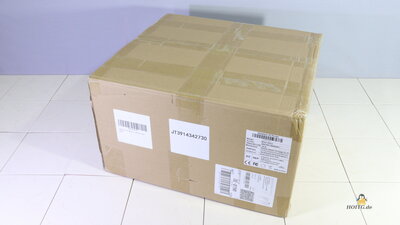
The package includes the tools needed for the assembly, replacing the 0.4mm nozzle or adjusting the mechanics. The short assembly instruction is included as a printed and a digital version, the latter is on the micro SD card.
Assembly
Figure 3: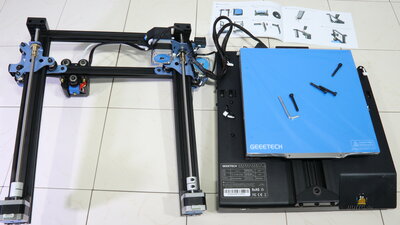
The Mizar S is delivered almost completely assembled, only the frame has to be mounted on the base and the spool holder has to be attached on top of the frame. 5 reverse polarity protected plugs connect all wires.
Mechanics
Figure 4: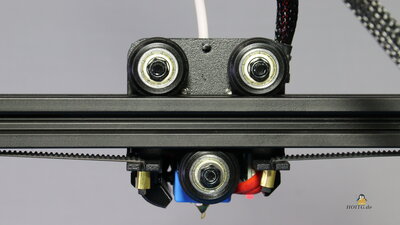
The axes are guided along extruded aluminum by plastic rollers with ball bearings. Backlash can be eliminated simply by turning an eccentric nut. The belt tension of the X and Y axes can be easily adjusted via small handwheels.
The extruder motor is located on the left of the X-axis and pushes the filament towards the hotend with a gear reduction of 3:1. The hotend is also well designed and can be easily disassembled if necessary.
Electronics
Figure 5: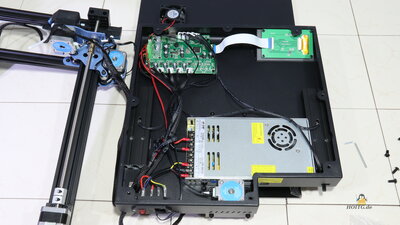
The electronic components insides the base are arranged properly. The power supply has an output voltage of 24V at up to 14.6A which corresponds to 350W.
An STM32F microprocessor is placed on the mainboard, running the open source firmware Marlin. The stepper motor drivers type TCM2208 are soldered to the circuit board.
The color touchscreen has a resolution of 480x320 pixels.
There is a force sensor for leveling the print bed on the mount of the hotend, which can be seen at the top of the heat sink.
Inside the filament sensor is a tiny, easy to trigger mechanical switch.
The limit switches for the Y and Z axes are optical switches. Only the X-axis has a mechanical limit switch.
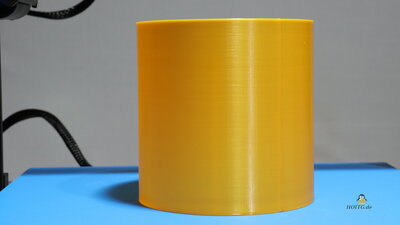
Tests
The G-code and stl files of the tests with the Geeetech Mizar S are available as download package (10.8MB).Figure 6:
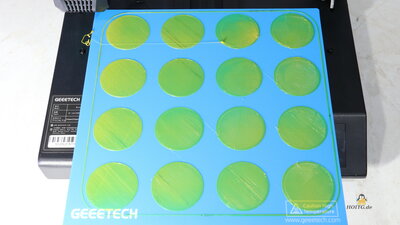
As a first test I have checked the level function. 16 discs, each with a diameter of 50mm, were printed across the build plate. The layer height is 0.2mm, the print speed was set to 15mm/s. All discs stick well to the print bed.
Details on the test procedure.
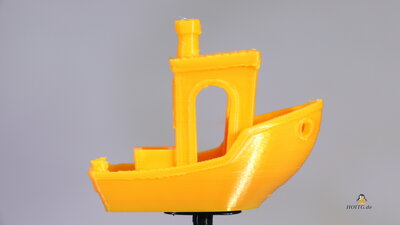
Figure 7:
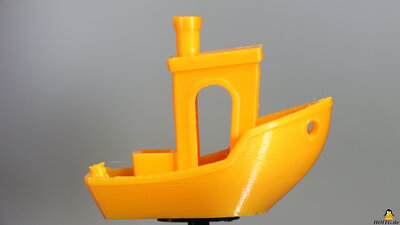
3D Benchy with optimal settings
Details on the test procedure.
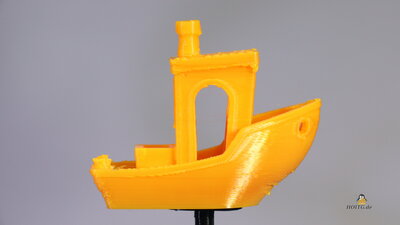
Figure 8:
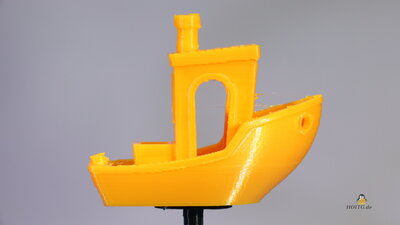
3D Benchy with 60mm/s
Details on the test procedure.
Figure 9:
3D Benchy with 90mm/s
Details on the test procedure.
Figure 10:
3D Benchy with 120mm/s
Details on the test procedure.
Figure 11:
n order to print large objects quickly, as much plastic as possible must be extruded per time unit, which was tested here.
Layer height: 0.4mm
Extrusion width: 0.7mm
A, E, I = 30mm/s
B, F, J = 60mm/s
C, G, K = 70mm/s
D, H, L = 90mm/s
More on the page with details on the test procedure.
Figure 12:
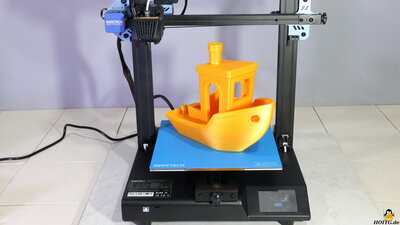
Large 3D Benchy with speed settings found to be good in the previous test.
Benchy enlarged to 450% (270x140x216mm)
Print time: 15 hours
Details on the test procedure.
Repairing
Figure 12: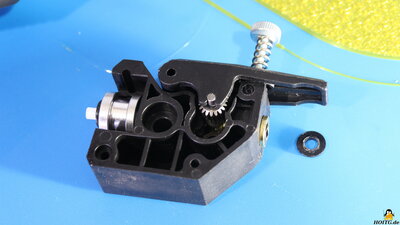
The connectors of the Teflon tube of a Bowden extruder sometimes break. The connector on the hotend is screwed and that's how it should be! I wanted to know if the connector on the extruder motor could also be loosened with pliers: it can't! In doing so, I damaged the connector, as can be seen in photo A. Geeetech would have sent me a spare part, but after some thinking I found a solution that makes this connector replacable, too. The printed part is glued to the extruder with superglue and a nut ensures that a normal connector can be screwed on. The spare part I printed is part of the download package of the Mizar S (10.8MB).
My conclusion
An easy-to-use 3D printer, therefore also suitable for beginners. Geeetech (as far as I know) does not claim any patents on the built-in technology, the open source firmware Marlin is used with a common 480x320 touchscreen.In addition to functions for ease of use (auto leveling, X-axis alignment), no unnecessary frills are implemented.
| <<< Genius Pro | Ceramic printers >>> |
![]()
![]()
![]()