| <<< X-Smart 3 | CRUX1 >>> |
Ender 3 S1 Pro from Creality
The gadget in moving pictures with audio
You can buy the Creality Ender 3 S1 Pro via my affiliate partner Geekbuying.
Get a discount with the code: NNNCREALITYPRO
You might want to add a spool of filament to your order.
By purchasing via the specified affiliate links, you support HOITG without any additional costs for you - thanks!
How Open Is This Gadget?
| Category | remark | Info |
|---|---|---|
| Firmware |
Uses Marlin firmware, modified source code is published. |
? |
| Software |
Machine data can be processed with common open source software that generates Gcode. |
? |
| Hardware |
All parts are very easy to replace, common screw types, common components. |
? |
| Electronics |
Mainboard uses a standard STM32 microcontroller. Stepper motor drivers are soldered onto the circuit board and can not be replaced. |
? |
| Website |
Website of Creality offers firmware downloads The Source code of the modified Marlin firmware is published. |
? |
| Patents |
As far as I know, Creality claims no patents on this printer. |
? |
About the Gadget
Abbildung 1: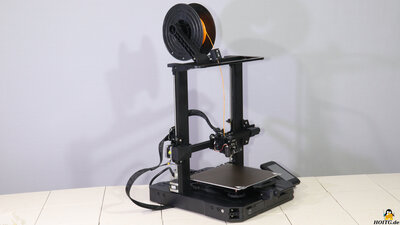
The Ender series has been constantly improved over the years and the current version 3 S1 Pro also comes with some nice improvements.
Following the rules of Marlin's GPL license, Creality publishes the source code of the firmware, modified for their printers, which includes that of the Ender 3, which is totally in the spirit of "How Open Is This Gadget?".
The device is solidly built and quite easy to disassemble in the event of repairs.
Technical Data
| Category | Value | Remark |
|---|---|---|
| Print volume | 220x220x270mm | |
| Dimensions | 490x455x700mm | Including filament spool on top of the frame. |
| Bed heating | Up to 110°C | |
| Hotend | Up to 300°C | |
| Firmware | Marlin | |
| Extras |
Filament sensor Resume after power loss. Print data can be transferred via USB-c or micro SD-card. LED light on top of frame Storage tray in the socket |
Package contents
Figure 2:
The printer ships well packaged with the core elements pre-assembled..
Assembly
Figure 3: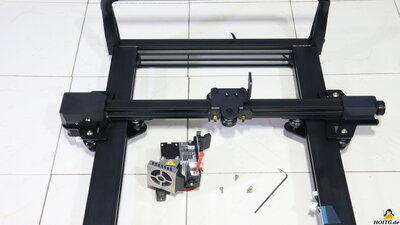
Only a few components have to be screwed and then the cables have to be plugged in - all is easy to be done and thus the 3D printer is ready for use quite quickly.
Mechanics
Figure 4: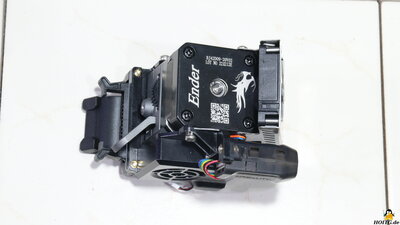
The wiring harness going to the extruder is easy to disconnect with a single plug. With that the extruder can be removed quickly in the event of a problem. The construction is quite compact, but all components can be easily dismantled. The plug-in connections of the internal cabling also contribute to an easy disassembly. The stepper motor pushes the filament towards the hotend via two metal gears with a reduction of 3.5:1. Both pinions that transport the filament are driven by the stepper motor via gears. All core components of the extruder are made of metal, which means that it can work with temperatures of up to 300°C in the hotend. The block with the heating element is attached to the coldend's heat sink with two screws, which prevents twisting when loosening the nozzle, another good detail solution. The 0.4mm nozzle has a standard 6mm thread.
The drawer in the base is a practical storage for tools and other small parts.
As is usual with Creality, the axes are guided along extruded aluminum with the help of plastic rollers with ball bearings. Backlash can be eliminated via eccentric nuts. The belt tension on the X, as well as on the Y-axis can be conveniently adjusted via handwheels.
The Z-axis is driven by two stepper motors, the spindles of which are coupled via a timing belt at the upper end - this means that the X-axis remains in parallel to the build plate, even when the motors are switched off.
If the mechanics are correctly adjusted, all axes run smoothly.
Electronics
Figure 5: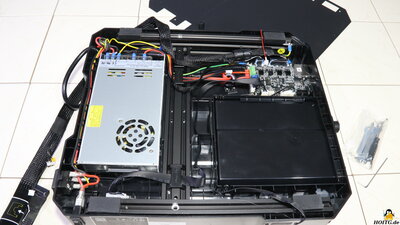
The electronics inside the base appear very tidy, the cables are laid neatly.
The power supply delivers an output voltage of 24V at up to 14.6A, which corresponds to an output of 350W.
Unfortunately, the stepper motor drivers on the mainboard are soldered and cannot be replaced.
An STM32 is used as microcontroller.
The fans of the mainboard and power supply work relatively quietly.
On the back of the touchscreen's circuit board is a card reader for micro SD cards, which is only required for updating the firmware.
Test prints
The G-Code and stl Files of the test prints done with the Creality Ender 3 S1 Pro are available as download (9.3MB).Figure 6:
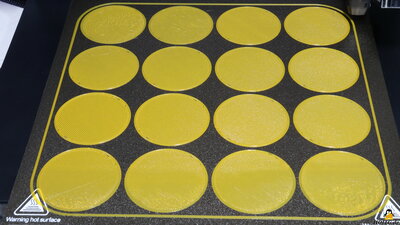
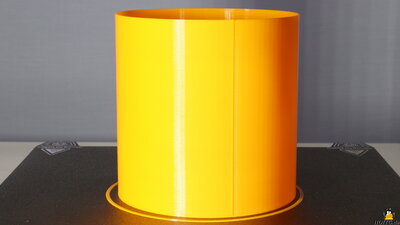
With this first print, the automatic level function is checked. 16 discs, each with a diameter of 50mm, are printed on the build plate. The layer height is 0.2mm, the print speed is set to 15mm/s.
All details on the test procedure.
Figure 7:
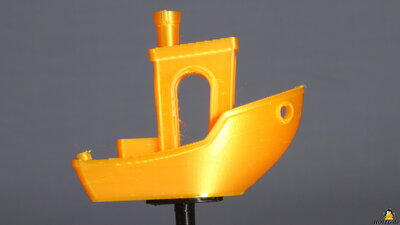
3D Benchy with optimal settings
All details on the test procedure.
With the test prints of the Benchy processed with increasing speed, it is less important to see what is bad and more important to see what is still printed well.
Read all details on the test procedure.
Figure 8:
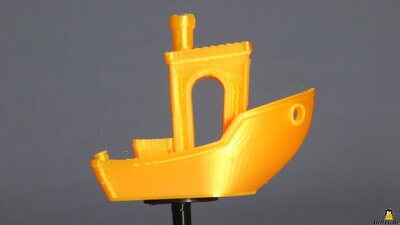
3D Benchy with 60mm/s
All details on the test procedure.
Figure 9:
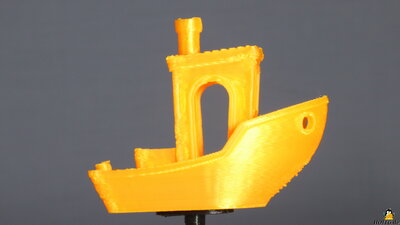
3D Benchy with 90mm/s
All details on the test procedure.
Figure 10:
3D Benchy with 120mm/s
All details on the test procedure.
Figure 11:
In order to print large objects quickly, as much plastic as possible must be extruded per unit of time, which is tested here.
Layer height: 0.4mm
Extrusion width: 0.7mm
A, F, K, P = 30mm/s
B, G, L, Q = 60mm/s
C, H, M, R = 70mm/s
D, I, N, S = 80mm/s
E, J, O, T = 90mm/s
All details on the test procedure.
Figure 12:
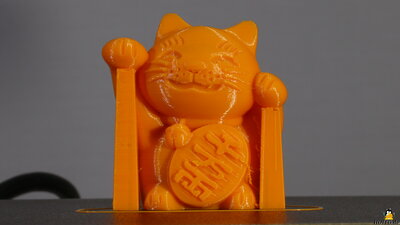
Gcode file "Cat" from the manufacturer's SD card
Print time: 3 hours
All details on the test procedure.
My conclusion
Due to the continuous improvement of the Ender series, the 3 S1 Pro is a very easy-to-use, problem-free 3D printer, which is therefore also well suited for beginners in 3D printing.Creality uses the open source firmware Marlin for the Ender 3 S1 Pro and is committed to making the changes made available to the general public.
In addition to functions for ease of use (autoleveling, touchscreen, SD card slot), there are no unnecessarily complicated frills installed. The drawer in the base and the LED light on the frame are practical.
| <<< X-Smart 3 | CRUX1 >>> |
![]()
![]()
![]()