| <<< Test procedure FDM printers | Ender 3 S1 Pro >>> |
X-Smart3 from QidiTech
The gadget in moving pictures with audio
You can buy the QidiTech X-Smart 3 via my affiliate partner Geekbuying.
Get a discount with the code: NNNDEXSMART3
You might want to add a spool of filament to your order.
By purchasing via the specified affiliate links, you support HOITG without any additional costs for you - thanks!
How Open Is This Gadget?
| Category | remark | Info |
|---|---|---|
| Firmware |
Uses Klipper firmware, modified source code is published. |
? |
| Software |
Machine data can be processed with common open source software that generates Gcode. |
? |
| Hardware |
Most parts are very easy to replace, common screw types, common components. Carbon rods on X axis can't be replaced, according to the manufacturer. |
? |
| Electronics |
Mainboard is a mini PC with USB interfaces. Stepper motor drivers are soldered onto the circuit board and can not be replaced. |
? |
| Website |
Website of QidiTech offers firmware downloads The Source code of the modified Klipper firmware is published. |
? |
| Patents |
As far as I know, QidiTech claims no patents on this printer. |
? |
About the Gadget
Figure 1: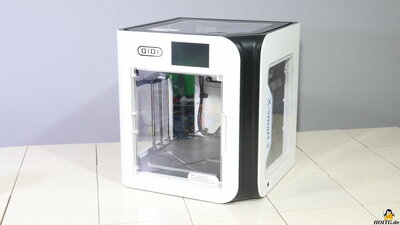
The X-Smart 3 is fully a fully enclosed printer and quite compact with the dimensions 37x37x40cm. The big advantage of an enclosed build space is that this enables the X-smart3 to process materials such as ABS, which shrink significantly while cooling down. Furthermore, all moving and hot parts are protected from unintentional access when the printer is in operation. A fan on the back of the printer can be turned on to cool down the build space if needed.
Technical Data
| Category | Value | Remark |
|---|---|---|
| Print volume | 175x180x170mm | |
| Dimensions | 370x370x400mm | +110mm for the filament spool on the back side of the printer. |
| Bed heating | Up to 120°C | |
| Hotend | Up to 300°C | |
| Firmware | Klipper | |
| Extras |
Filament sensor Print data can be transferred via USB stick or WLAN. LED light on top of frame |
Package contents
Figure 2:
The printer ships well packaged and completely assembled.
Assembly
Figure 3: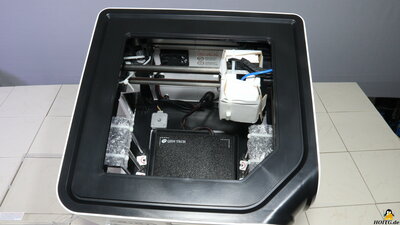
After unpacking, all moving parts on the printer are fixed with cable ties or screws to secure them during transport. The removal of those locks is the most time consuming part of bringing this printer in operation. After that, all you have to do is plug in the filament holder and connect the device to you mains voltage - the X-Smart3 is now ready to use.
Pictures C-L show the printer with the plastik covers removed. In order to be able to remove the plastic paneling, you first have to loosen a few screws. Then it takes a bit of courage, because a few more clipped connections on the lid have to be loosened - these connectors sometimes get damaged in the process. Normally, however, this paneling does not have to be removed, all service work can also be carried out with the panels on the frame, I just wanted to give you a better look on the construction.
Mechanics
Figure 4:
Z-axis belt tension is adjusted by simply moving a pulley. The two belts on the motors for the X and Y axis are tensioned by first loosening two somewhat hidden screws. The tension is then adjusted with a third screw, which can be done very sensitively with this mechanism. After that all screws must be tightened again.
The movement of the print head along the X and Y axes is designed via a so-called CoreXY mechanism. This type of mechanics allows a very compact design. Furthermore, the print bed and thus also the objects to be printed are only moved along the Z-axis, which happens very slowly. The maximum print volume is 17.5x18x17cm.
The X-Smart3 is advertised as a very fast printer - the moving parts of the X and Y axes are therefore trimmed to be as lightweight as possible. This applies to the round carbon rods on which the print head is guided along the X-axis. According to a sticker on the printer, those carbon rods can not be replaced!
The plastic cover on the front of the print head can be removed quite easily. Before pulling out the Teflon tube, the lock must be pushed down. Two screws have to be loosened in order to be able to remove the hotend. This allows any blockages in the extruder to be removed very easily.
Of course, I'm not giving up at this point, and will continue to disassemble the extruder to let you take a look at all the components. The filament is pressed towards the hotend from two sides via a gear. With the pinion on the extruder motor there is a reduction of 9.5:1. The extruder motor is a very lightweight model with a round design.
There is a flexible steel plate on the print bed, which makes it easier to detach finished prints. This plate is coated on both sides and snaps well into the specified position, held in place by magnetic force.
Electronics
Figure 5: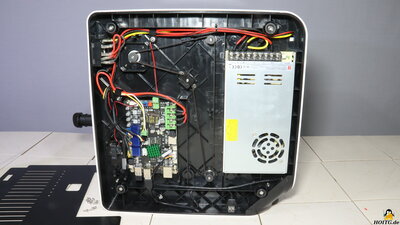
Most of the electronic components are located in the base of the printer that is accessible after removing a metal plate. The power supply delivers an output voltage of 24V at up to 14.6A, which corresponds to 350W.
The mainboard turns out to be a mini-PC with a 64-bit Coretex A53 processor and USB interfaces as well as a LAN socket, which, however, is not accessible from the outside. WLAN is implemented via an USB stick. The stepper motor drivers are soldered to the circuit board - so they cannot be replaced. Two super caps ensure that the PC can shut down correctly when the printer is switched off.
The firmware of the X-Smart3 is based on the open source solution Klipper and the manufacturer of the printer complies with the requirement of the GPL license to publish the modified source code. A link to the corresponding Github repository of the current firmware version is available directly on the Qidi support page - that's exactly how it should be! A firmware update can be installed relatively easily via the USB stick, but it takes some time - in my case a good 20 minutes.
Something the X-Smart3 doesn't like is switching the printer off and on again immediately - there should be half a minute before switching on again, otherwise an error message will appear.
Print data can be sent via USB stick or transmitted through WiFi.
Test prints
The G-Code and stl Files of the test prints done with the Qidi X-Smart 3 are available as download package (7.6MB).Figure 6:
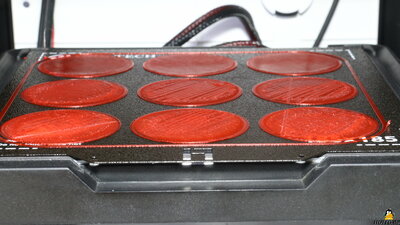
With this first print, the automatic level function is checked. 16 discs, each with a diameter of 50mm, are printed on the build plate. The layer height is 0.2mm, the print speed is set to 15mm/s.
All details on the test procedure.
Figure 7:
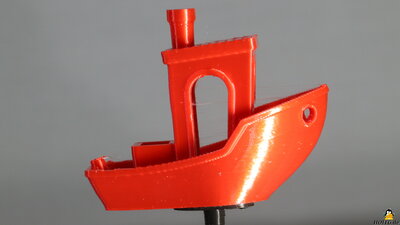
3D Benchy with optimal settings
All details on the test procedure.
Bei den folgenden Schnelldrucken der Benchy kommt es mit zunehmender Geschwindigkeit weniger darauf an zu sehen, was schlecht ist, sondern vielmehr, was noch gut gedruckt wird.
Details hierzu gibt's in dem Kapitel zum Testverfahren.
Figure 8:
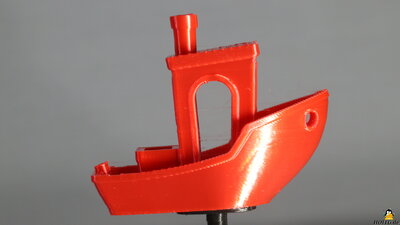
3D Benchy with 60mm/s
All details on the test procedure.
Figure 9:
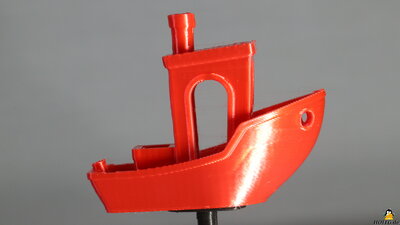
3D Benchy with 90mm/s
All details on the test procedure.
Figure 10:
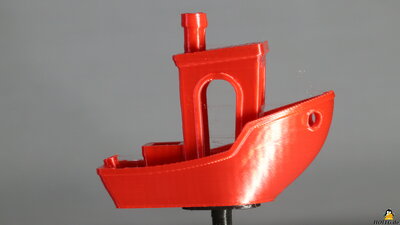
3D Benchy with 120mm/s
The cooling works great, even the Benchy printed at 120mm/s in 30 minutes looks very good.
All details on the test procedure.
Figure 11:
In order to print large objects quickly, as much plastic as possible must be extruded per unit of time, which is tested here.
Layer height: 0.4mm
Extrusion width: 0.7mm
A, E, I, M = 30mm/s
B, F, J, N = 60mm/s
C, G, K, O = 80mm/s
D, H, L, P = 90mm/s
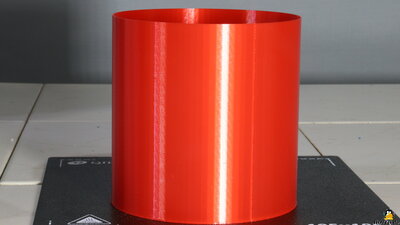
Only at 90mm/s do errors appear on the cylinder surface. The deviation in weight is hardly noticeable with just 1g.
All details on the test procedure.
Figure 12:
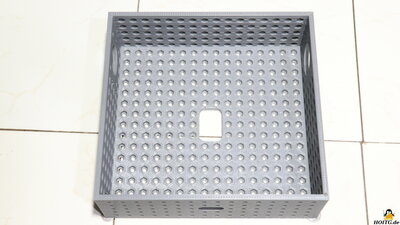
Robot chassis from ABS with the dimensions 160x170x55mm
Print time: 14 hours
My conclusion
The X-Smart 3 from QidiTech is an easy-to-use 3D printer with an enclosed build space, which means that e.g. ABS can be processed very well. Furthermore, the device is trimmed for high printing speeds and the X-Smart 3 fulfills this promise very well. The printer works at a very high level in terms of both material throughput and part cooling. If you're in a hurry, this device is a good choice. The only downside: According to a sticker on the device, the carbon rods that guide the X-axis are not replaceable. However, there isn't much wear on this component nor do I see a chance for breaking these, so no need to worry.Qidi uses the open source firmware Klipper for the X-Smart3 and publishes the modified source code.
| <<< Test procedure FDM printers | Ender 3 S1 Pro >>> |
![]()
![]()
![]()